Table of Contents
Paperless Attachment
by MBA Business Software
Enhance Sage 100 Paperless Office to attach documents to the emails being sent.
The Paperless Office module allows users to set up PDF and electronic delivery options for all standard reports, journals, and registers as well as most customer, vendor, and employee forms. The setup process for Paperless Office follows a tiered approach allowing it to be set up with options specific to a company, module, customer, vendor, employee (payroll), or individual document. More information about Paperless Office can be found in Sage’s manual for Sage 100.
Electronic Delivery Message Maintenance is used to maintain the default messages when using electronic delivery of the PDF documents. The maintenance screen can be accessed by logging into Sage 100 and going to Modules | Paperless Office | Setup | Electronic Delivery Message Maintenance. Paperless office, as of the 2018 version, was designed to only have one attachment that is automatically created and sent with the Email.
Purpose of this enhancement
The Paperless Attachment enhancement was created to allow a global attachment for Paperless Electronic Delivery. This enhancement allows emails going through Paperless Office to have one additional attachment.
Examples of this one attachment might be a Terms and Conditions document, a Sales Flyer or a Microsoft Contact File.
Take Note
Current version only attaches document to:- Accounts Receivable
- Invoice
- Sales Order
- Invoice
Installation
The enhancement can be downloaded for the version of Sage 100 that is needed by clicking the download links in the Versions section in this document. The downloaded file will be a self-extracting zip file with only a single executable within the zip file. Extract that executable (.exe) to your desktop or preferred folder and execute by double clicking on the icon. Execute the installation program and follow the instructions. While the installation does not require everyone to be out of Sage 100 before installing, it may be necessary to log out and log back in to display menu changes. 
Enter the destination folder of the Sage 100 application. The path should include the MAS90 folder. Example: “C:\Program Files (x86)\Sage 100 Standard ERP\MAS90\”. Click on Install when done. Files will be extracted to the folder specified and will trigger the Product Install to Sage 100. Click on Install to install the Enhancement to Sage 100. 
Version Difference Warning
If there is a version difference a Version Mismatch Warning will appear.

This warning is expected if product updates have been installed. If the first two sets of numbers, 6.00 in the example shown, match then click on OK. If they do not match click on the red X and exit the installation. The correct version of the modification will need to be downloaded.
Once it is done installing the Enhancement, there will be two buttons displaying, Finish and Log. Click on the Finish button to complete the install process. If an error occurred on the screen or to validate the install, click on the Log button to view the install log. At this point, the Enhancement has been installed.
Registration
Once the enhancement has been installed it must be registered for it to be active. Access to registration will have to be assigned to a user or group to have access to registration. To assign permissions, go to Modules | Library Master | Main | Role Maintenance. Enter the role assigned to the user or group that will need to have access to the MBA Enhancement Registration and click on the Tasks tab. Navigate to Library Master | Maintenance/Data Entry | MBA Enhancement Registration and make sure it is checked to allow access. To register the enhancement, the user must have at least View and Modify checked. If uninstalling an enhancement, Remove must be checked. To launch registration, go to Modules | Library Master | Utilities | MBA Enhancement Registration.
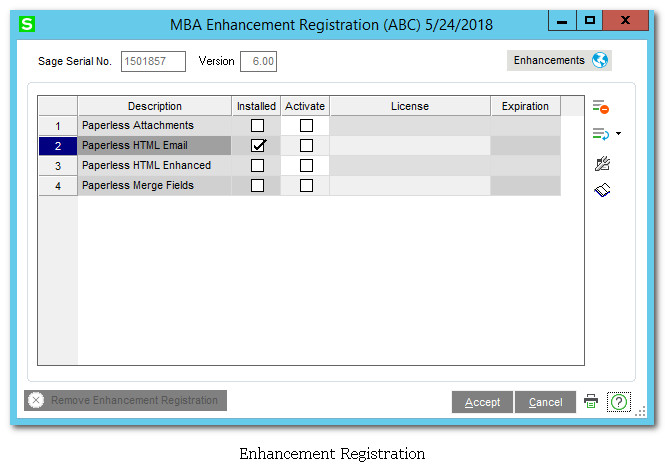 A list of MBA enhancements will be displayed in the registration.
Each enhancement that has been installed will display a check in the box in the column called Installed. The check box in the Activate column will appear once the enhancement has been successfully registered. If there is not a check mark, when clicking in the box, it will open a web page to the online ordering for that enhancement. Once a license key has been generated, enter it in the license column. If the license is valid, a check mark will appear in the Activate column. If the enhancement has an expiration date, the Expiration column will display the last day that the enhancement will work without being renewed.
Key Information
License keys will have the enhancement code followed by a 10 digit number. They are specific by enhancement and by the serial number of the installation.
Changes to a line can be undone by clicking on the Reset  button. All rows can be reset by clicking on the drop down arrow on the Reset button and clicking Reset All Rows.
The Print  button will print a list of all the enhancements indicating what has been installed and activated along with other information such as the description, license key and the expiration. This documentation can be accessed from the MBA Enhancement Registration by clicking on the help
  button. When done making changes or registering enhancements, click on the Accept button to close the MBA Enhancement Registration. Clicking on Cancel will close the screen without any changes being saved.
Setup and configuration
System Wide enhancement options are accessed through Modules | Library Master | Utilities | MBA Enhancement Registration. Click on the enhancement description to access its configuration. This documentation can be accessed by clicking on the Manual  button. This enhancement has a system wide configuration. To access it, click on the Configure
  button in the MBA Enhancement Registration screen.
 Enter the path to the attachment or click on the browse
  button and search for the file you wish to attach.
Path must be accessible by all users
Attachment will not be attached to Email if the file is not accessible by the user processing through Paperless Office electronic delivery.
Once the additional attachment has been set in the options, click on Accept on the options screen. Then click on Accept on the MBA Enhancement Registration screen. When an email is sent the additional attachment will be added to the email as shown below.

In this example, he standard invoice has been attached as well as our additional attachment which happens to be a Microsoft Contact file.
Uninstalling
To uninstall an Enhancement, launch the registration program Modules | Library Master | Utilities | MBA Enhancement Registration. Select the Enhancement from the grid and press the Uninstall  button. This will remove the enhancement from the system. A message box will appear stating which enhancement is being uninstalled.
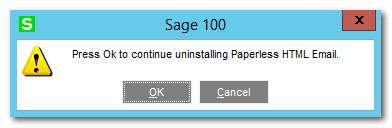 Click on OK to uninstall or Cancel to go back to the MBA Enhancement Registration without making any change. When an enhancement is removed the check box under Installed will be unchecked and the license with expiration date will be removed.
Once all enhancements have been uninstalled, the MBA Enhancement Registration can be removed by clicking on the Remove Enhancement Registration  button. This button is only activated once all enhancements have been uninstalled. A message box will appear stating that it will uninstall the MBA Enhancement Registration.
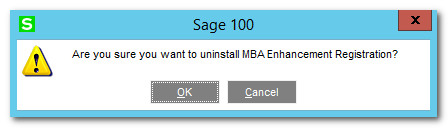
Click on OK to remove it or click Cancel to return to the MBA Enhancement Registration without making any change. A message will display when the files have been removed. Click on OK to close the window.
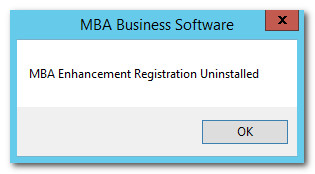 When the MBA Enhancement Registration is removed, users will need to exit out of Sage 100 to have their menu updated. Once the menu is updated, the menu item for MBA Enhancement Registration is removed.
Take Note
Uninstall vs DeactivateBefore Uninstalling the Enhancement, which removes your License and Expiration, consider just de-activating the Enhancement by un-checking the box under the Activate column. Your Enhancement will not function until you re-activate the Enhancement by checking in the box under the Activate column.
Support
For support on this or any other MBA Business Software Enhancement, please send us an email via our contact page.
Troubleshooting
Paperless Attachment only works when the following requirements are met:
- Enhancement must be installed
- Enhancement must be registered
- File path has been set for the specific company
If the file path has been specified, then check to make sure that the product is installed and registered. Check Registration by going to Modules | Library Master | Utilities | MBA Enhancement Registration. Navigate to the line for Paperless Merge Fields enhancement. Confirm that there is a check box in Install and Activate. There should be a date in the Expiration column. Confirm that the date is valid and has not expired. If it has expired, then the subscription for the enhancement will need to be purchased or renewed.
List of Files Changed
These are the files that have been changed
| Paperless Attachment Fields | Type | Description |
|---|---|---|
| Links\SY_EmailEngine.PVC | Override trigger | Indicates an override exists |
| SY\SY106_PDF_EmailEngine.pvc | Class Override | Changes Email Engine |
| SY\SY106_PDF_EmailEngine_UI.pvc | Class | Attachment Options User Interface |
| SY\SY106_PDF_EmailEngine.M4L | Panel Library | Attachment Options Panel |
| MBA Enhancement Library | Type | Description |
|---|---|---|
| SY\SY106_Enhancement_SVC.PVC | Class | Enhancement Service Object |
| SY\SY106_INI_SVC.PVC | Class | INI Service Object |
| SY\SY106_License.M4L | Panel Library | License Panel Library |
| SY\SY106_License.PVC | Class | License |
| SY\SY106_License_BUS.PVC | Class | License Business Object |
| SY\SY106_License_SVC.PVC | Class | License Service Object |
| SY\SY106_License_UI.PVC | Class | License User interface |
| SY\SY106_Lister_SVC.PVC | Class | Lister Service Object |
| SY\SY106_Nomads.PVC | Class | Nomads Enhancements |
| MAS_System\SY106_Enhancement.M4T | Class | Table of MBA Enhancements |
| MD\MD106_Ini_SVC.pvc | Class | INI Service Object |
| MD\MD106_Install.M4L | Panel Library | MBA Install Panel Library |
| MD\MD106_Install.M4P | Program | Installation Program |
| MD\MD106_Install_BUS.pvc | Class | Install Business Object |
| MD\MD106_Install_UI.pvc | Class | Install User Interface |
| MD\MD106_UpdateLibrary.PVC | Class | Install Panel Update |
| Launcher\WizWurks.bmp | Image | Logo for Install |
| MBA_Install.ini | INI File | MBA Install Configuration File |
| Reports\SY106_LicenseListing.rpt | Crystal Report | List of MBA Licenses and enhancements |
Versions
Paperless Attachment is available in the versions listed below. If your version is not listed, please send us an email via our contact page. The download links will be available after an account is created on our website and a license has been released.
Additional Notes
Related information about the Enhancement, this website, and its documentation
License Agreement
THIS SOFTWARE IS LICENSED BY MBA BUSINESS SOFTWARE TO CUSTOMERS FOR THEIR USE ONLY IN ACCORDANCE WITH THE TERMS SET FORTH IN THIS CUSTOMER LICENSE AGREEMENT. OPENING OR USING THIS PACKAGE CONSTITUTES ACCEPTANCE OF THESE TERMS. IF THE TERMS OF THIS LICENSE ARE NOT ACCEPTABLE, THE CUSTOMER MAY OBTAIN A FULL REFUND OF ANY MONEY PAID IF THIS UNUSED, UNOPENED PACKAGE IS RETURNED WITHIN TEN (10) DAYS TO THE DEALER FROM WHICH IT WAS ACQUIRED
- LICENSE. MBA Business Software, a Georgia corporation as Licensor and owner hereby agrees to grant you as Licensee a non-exclusive license to use the enclosed software subject to the terms and restrictions set forth in this License Agreement. Title in and ownership of all programs and program enhancements or modifications written by MBA Business Software shall remain at all times vested in MBA Business Software. The right granted by this Customer License Agreement and your payment of the non-refundable License fee is the right to use the Program in accordance with the terms of this Customer License Agreement. Delivery of a copy of the Program to you is made solely to enable you to exercise this right.
- COPYRIGHT. This Program is copyrighted and all rights are reserved by MBA Business Software and SAGE, INC. You may not copy or reproduce any part of the Program except to copy the Program for backup purposes. If you make a backup copy you must reproduce and include the copyright notice on it. The distribution of the product is intended for the use of the original Licensee only and for use only on the computer systems specified. Lawful users of this Program are hereby licensed only to read the Program from its medium into the memory of a computer only for the purpose of executing the program. The documentation is also copyrighted and all rights are reserved. This document may not, in whole or in part, be copied, photocopied, reproduced, translated, transmitted or reduced to any electronic medium of machine readable form without prior consent, in writing, from MBA Business Software. The Licensee recognizes that MBA Business Software has expended considerable time, effort and money to develop the licensed Software and Manual and that MBA Business Software will be substantially damaged by its unauthorized use, sale or distribution. In addition to recovery of all damages and the obtaining of injunctive relief as provided by law, in the event legal action must be taken to enforce this provision, the Licensee will pay MBA Business Software all reasonable legal fees incurred in enforcing the rights of MBA Business Software under this provision.
- RESTRICTIONS ON USE AND TRANSFER. The original and any backup copies of the Program and its documentation are to be used only in connection with a single computer or network file server. You may physically transfer the Program from one computer to another, provided that the Program is used in connection with only one computer or network file server at a time. You may not distribute copies of the Program Documentation to others. The Program is to be used exclusively for business purposes and not for personal, family or household use. YOU MAY NOT USE, COPY, MODIFY, OR TRANSFER THE PROGRAM, IN WHOLE OR IN PART, EXCEPT AS EXPRESSLY PROVIDED FOR IN THIS LICENSE AGREEMENT. IN ADDITION, YOU MAY NOT MODIFY, ADAPT, TRANSLATE, REVERSE ENGINEER, DECOMPILE, DISASSEMBLE THE PROGRAM, OR CREATE ANY DERIVATIVE WORK BASED UPON THE PROGRAM.
- WARRANTY. MBA Business Software’s software is licensed “as is” with no warranties of any kind, either expressed or implied, other than the following: MBA Business Software will repair any bugs or flaws found in the software. Flaws of a critical nature which affect the basic functionality of the software will be repaired on an “emergency” basis, with a corrected distribution sent via E-Mail or Download link. Flaws of a non-critical or cosmetic nature will be repaired on a timely basis, and a corrected distribution updated on MBA Business Software’s enhancement website. All incidental or consequential damages that result from any defect in the software, even if MBA Business Software has been advised of the possibility of such damages will be assumed by you.
- NO OTHER WARRANTIES. No dealer or distributor of MBA Business Software products or any agent of MBA Business Software is authorized to make any representation of warranty with respect to the Program except those expressly stated in the Customer License Agreement.
- LIMITATION OF LIABILITY. Neither MBA Business Software nor anyone else who has been involved in the creation, production or delivery of this program shall be liable for any direct, incidental or consequential damages.
- TERM. This license is effective until terminated. You may terminate it at any time by returning the Program and Documentation together with all copies, modifications and merged portions in any form to MBA Business Software. The license will also be terminated by MBA Business Software immediately and without notice if you fail to comply with any term or condition of this License Agreement.
- ACKNOWLEDGMENT. Your opening this package, use of this program or signature on the warranty registration card acknowledges that you have read this customer license agreement and agree to its terms. You further agree that the license agreement is the complete and exclusive statement of the agreement between yourself and MBA Business Software and supersedes any proposal or prior agreement, oral or written, and any other communications between yourself and MBA Business Software or dealers and distributors of MBA Business Software’s products relating to the subject matter of this agreement.
- ASSIGNMENT. You may not sub license this license or the Program. You may not rent this Program or the use of the Program. You may not transfer this copy of the Program unless the recipient agrees in writing (and a copy of such acceptance is sent to MBA Business Software, 1117 Perimeter Center West, Suite E210, Atlanta, GA, 30331) to accept all of the terms of this Customer License Agreement. Any attempt by you to otherwise rent, sub license, assign or transfer any of the rights, duties or obligation here under is void and may be the cause for immediate termination of the license. MBA Business Software may assign any of its rights and obligation under this agreement to any party without notice to you.
Subject to Change
Information on this website is subject to change without notice.
Where is this Documentation
This document is located at http://wiki.mbabsi.com/doku.php/enhancements/sage100/paperless/cs100p-attach
TradeMarks
This Web site is owned by MBA Business Software. MBA is independent from Sage and is not authorized to make any statement, representation or warranties or grant any license or permission on behalf of Sage regarding any product, service or Web site content. Certain materials made available on or through this Web site are owned by Sage and cannot be used without the prior written permission of Sage.
Sage, the Sage logos, and the Sage product and service names mentioned herein are registered trademarks or trademarks of Sage Software, Inc., or its affiliated entities. All other trademarks are property of their respective owners. Sage material is used with permission from Sage Software, Inc. www.sagenorthamerica.com.
Sage 100® is a registered trademark of Sage Software.
Contact Information
MBA Business Software
6100 Lake Forrest Drive
Suite 520
Atlanta, GA 30338
678-495-5700 8:00 am to 5:00 pm EST
Legal Note
This documentation and the software described in it, is prepared and published under license. Sage Software has not tested or verified either the software or any representation in this documentation regarding the software. Sage Software does not make any warranty with the respect to either this documentation or the software referred to herein. And specifically disclaims any warranty, express or implied, with respect hereto, including the warranties of fitness for a particular purpose and merchantability.